
Tadelakt - Water Resistant Lime Plaster
by Nic, Core Team
What is Tadelakt?
Simply defined Tadelakt is a type of polished lime plaster. Many cultures around the world have polished lime plaster, but none have captured the imagination in the way that Tadelakt has. At the Ranch we offer a variety of day workshops and our Tadelakt day workshop is by far one of the most popular natural building options.
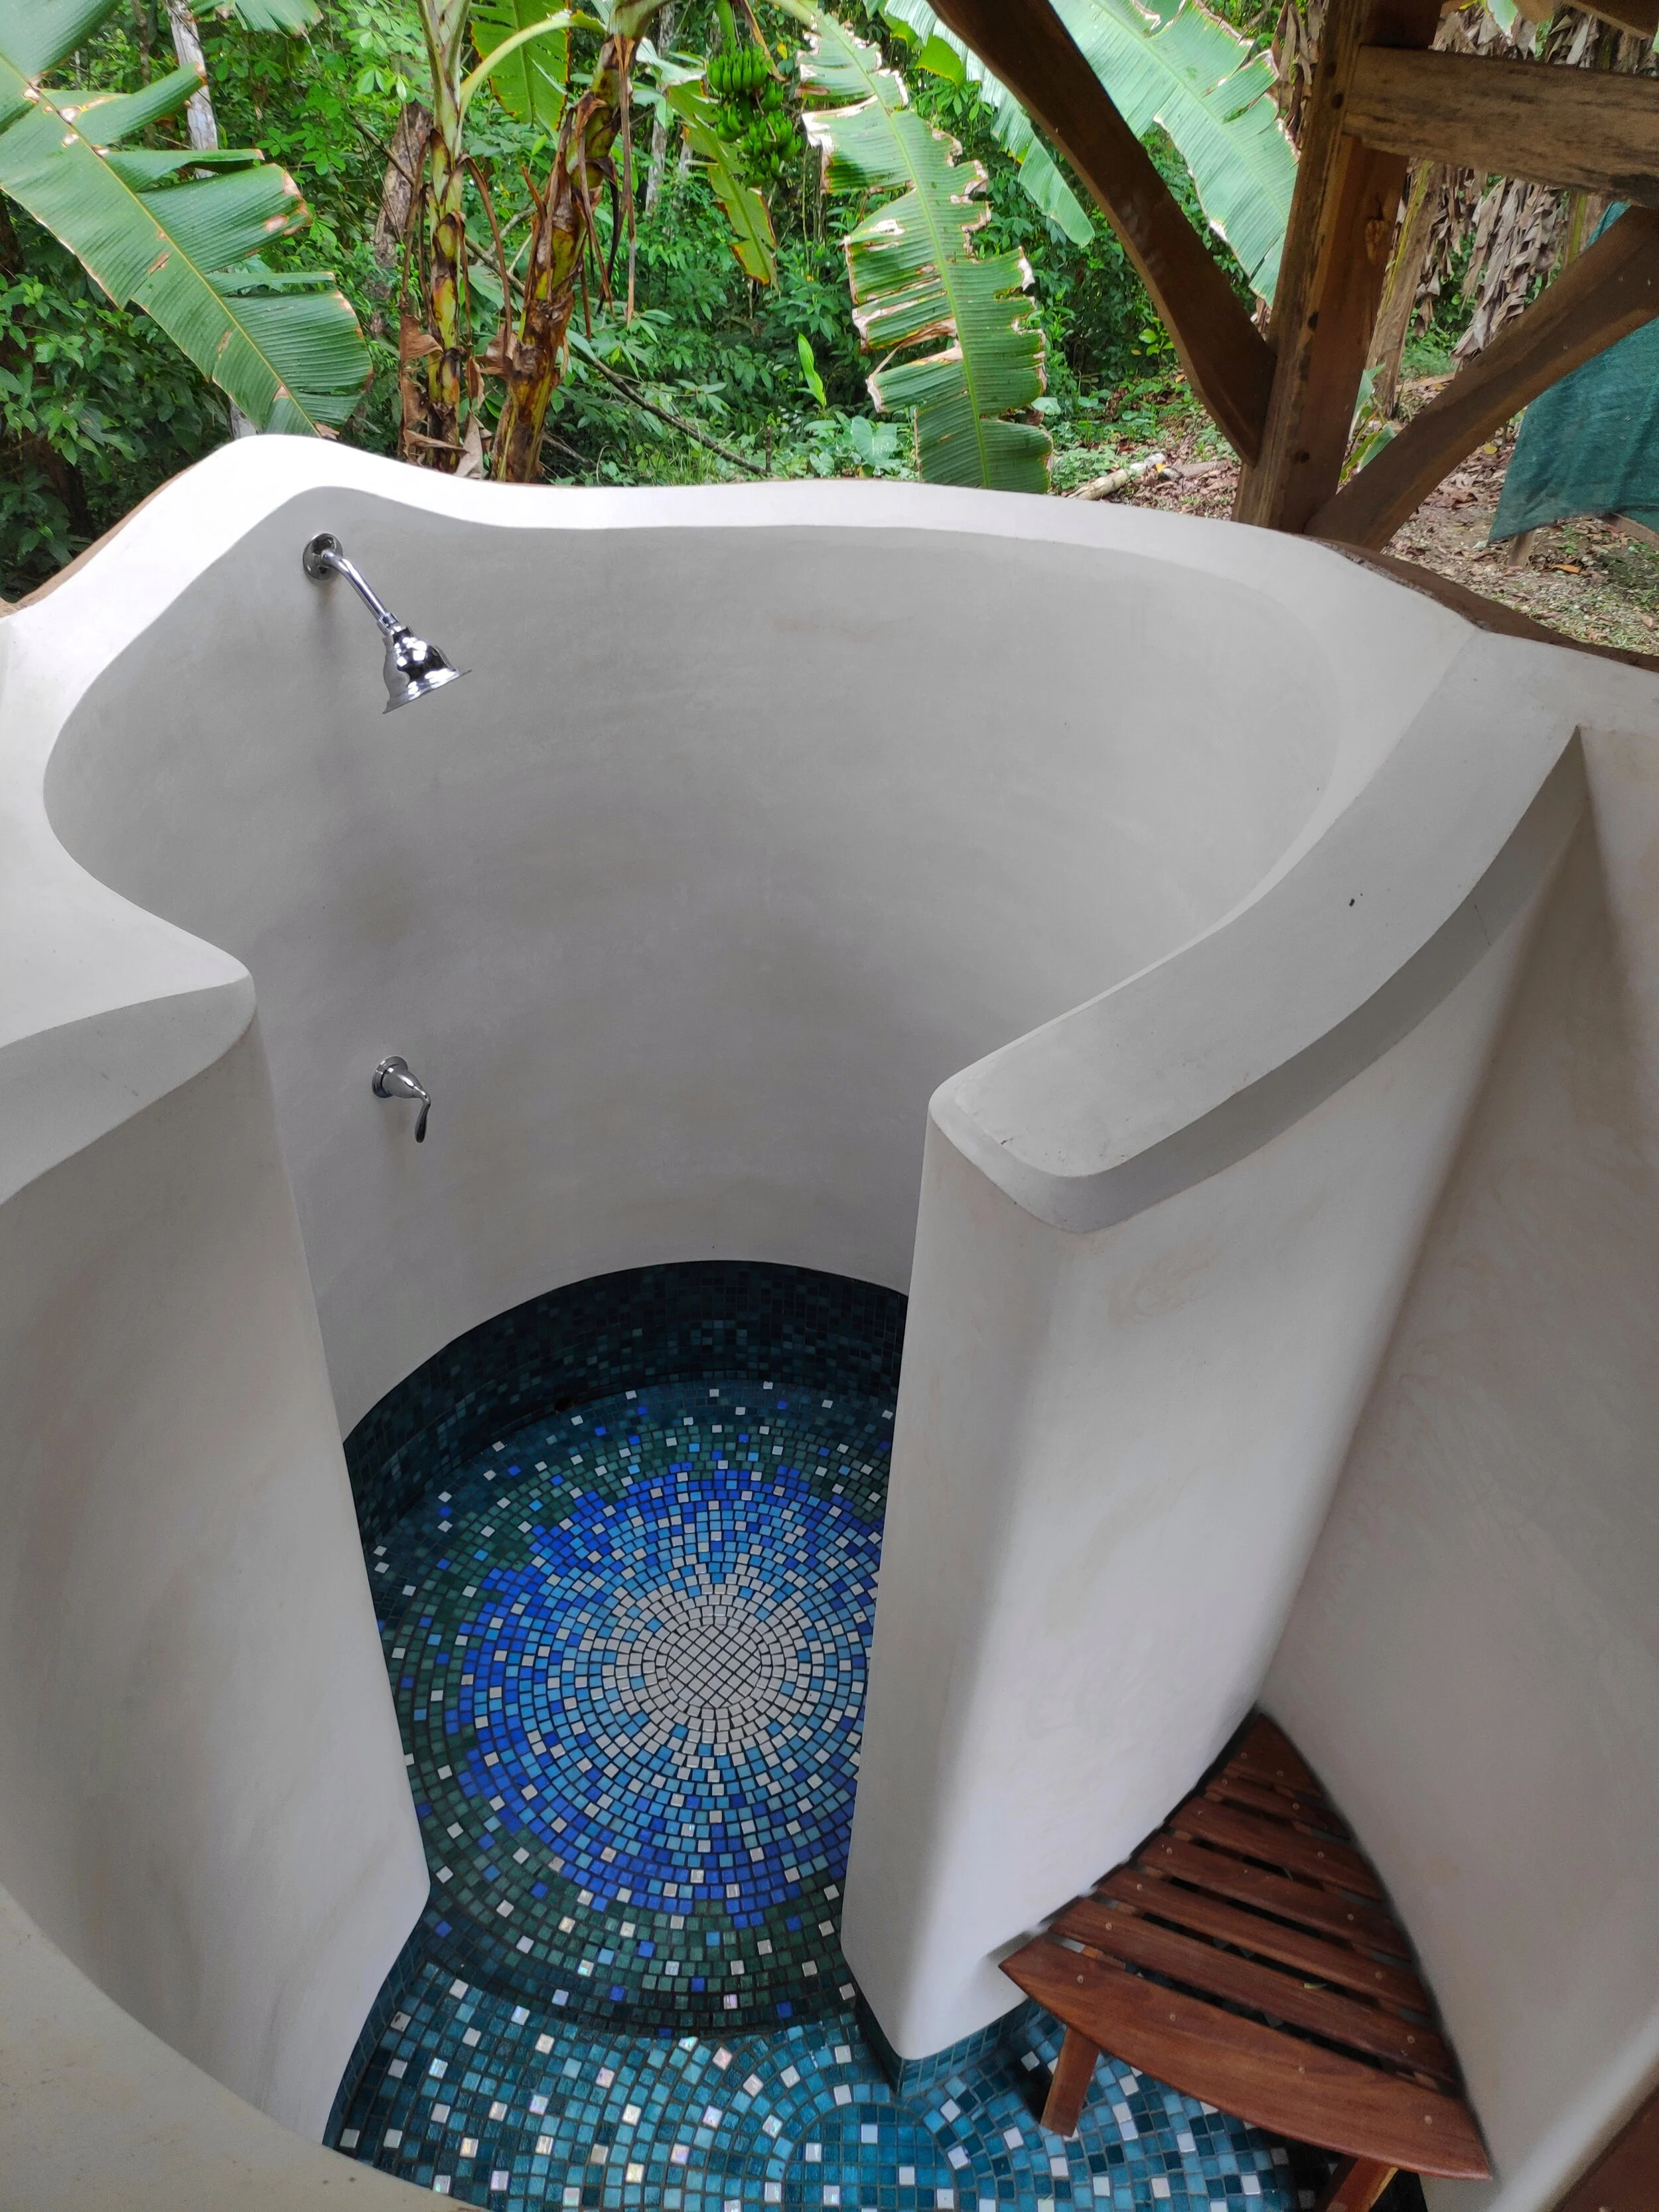
One of our showers at the Ranch using tadelakt
Tadelakt is often used in wet places as it has excellent properties for resisting the penetration of water. Traditionally this plaster was used in Morocco in the public baths and now more commonly around the world in sinks, kitchens, countertops etc… We frequently use Tadelakt plaster in wet areas like shower walls and sink areas. Read here for how we built this Tadelakt Shower.
Before talking more about Tadelakt it is important to understand the lime cycle and how it works so we can understand what different products we are looking for and how they are used in our plasters.
This basic Lime cycle shows you how Limestone is taken from the ground and heated at kilns to around 1500°F. This heating process burns the lime and the Carbon Dioxide is released into the air. This creates quicklime which is highly reactive. When water is added to this a lot of heat is given off during the reaction and the quick lime becomes calcium hydroxide. This is also known as hydrated lime or lime putty and is typically the product that you buy for building; it can come in a powder (if minimal water is added) or in a putty (if it is slaked in excess water). The putty can be aged for periods of time creating a more workable higher quality product, it is often more expensive and higher quality the longer it has been aged. It is highly caustic at this stage and gloves and goggles should be used when handling it. When the calcium hydroxide is exposed to the air, for instance when it is applied to a wall in a plaster, it then begins to react with the carbon dioxide in a process called carbonation. As it carbonates it turns back into limestone. This is known as the lime cycle.


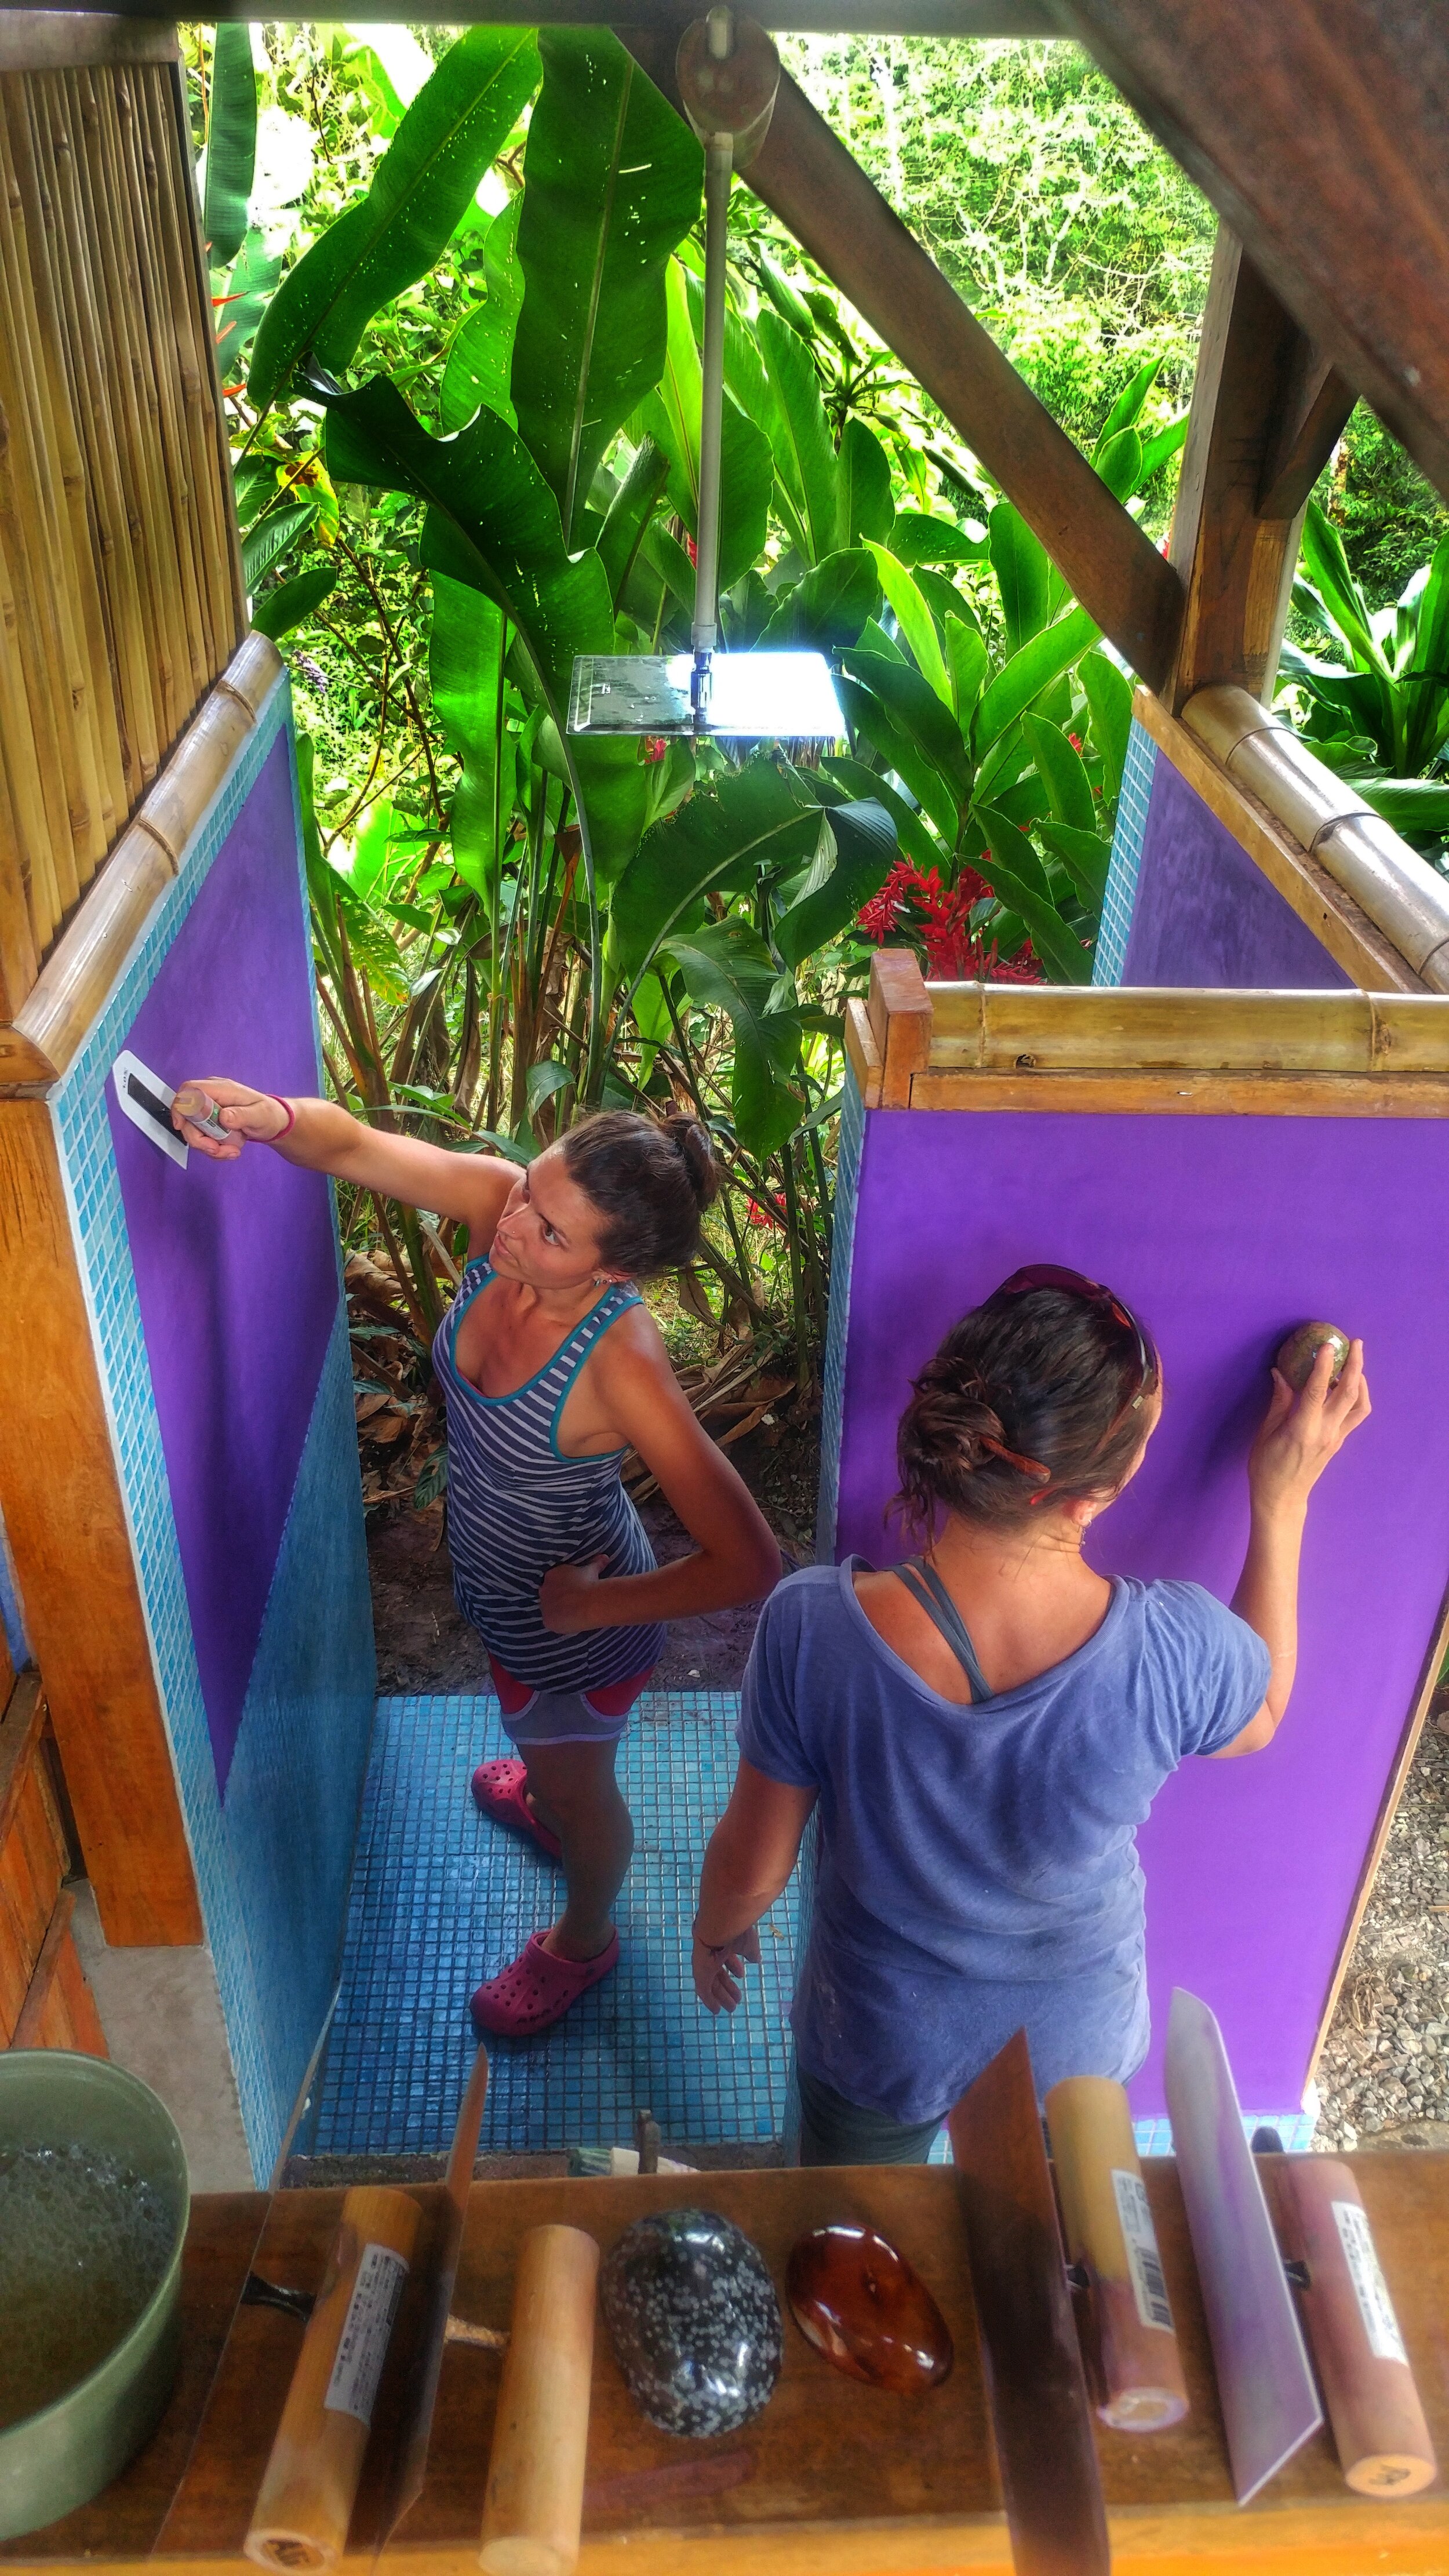
Teaching students how to apply tadelakt in our Natural Building Workshop
What Makes Tadelakt unique?
As I said Tadelakt is a polished lime plaster, in order to polish a lime plaster you need to work the plaster with the appropriate tool at the exact time in its drying cycle, too early and you will damage the surface and too late and you can “burn” the plaster. The timing of polishing is true of any polished lime plaster and can be universally applied to a variety of lime mixes to achieve a somewhat similar finish (polished).
There are specific characteristics of our lime plaster mix and finishing technique though which are “required” to call it Tadelakt. Although I don’t believe there are any international laws that are associated with calling a product or a finish Tadelakt, we can start to think of it a bit like that. Just like when you buy rum you would expect it to be made from sugar cane, distilled and aged in barrels, in my opinion it is the same with Tadelakt. Well not exactly the same as there are no laws associated with the name Tadelakt whereas there are with calling it rum, but you get the idea! Whilst I am going to outline some of the things which I believe set a Tadelakt plaster apart from other polished lime plasters, there will also be some overlap. Some people may also say that if the plaster is not made and applied by a traditional specialist from Morroco, in Morroco then it is not Tadelakt, but personally I think that is taking it a bit far and the key theme is the ingredients and the methodology rather than the location and the applicant.
In my opinion there are three fundamental properties that define Tadelakt as a unique polished plaster.
The Aggregate
In the majority of lime plasters, although there are definitely exceptions, (especially in Japan) you are combining Lime (Calcium Hydroxide) with an aggregate. Typically this aggregate is silica based as the most common form of sand around the world is usually silicon dioxide in the form of quartz. What makes Tadelakt unique is the fact that the aggregate is not silica based it is a crushed limestone (CaCO3). Traditionally this was composed of the limestone that had not been heated sufficiently in order to create quick lime (Calcium Oxide). We source our crushed limestone from agricultural supply stores. It is commonly sold as a soil amendment for acidic soils. The fact that a limestone based aggregate is used is important as it means there is no chemical reaction between the aggregate and the binder and it means you can make your Tadelakt mix and store in indefinitely as long as it is not exposed to air (specifically carbon dioxide). We do this by just covering the mixture with a layer of water. If we make a mix of silica based aggregate and lime over time they will begin to react with one another forming calcium silicates which mean that the lime and the aggregate have become hard and unusable as a plaster. I have heard different opinions about whether this is true, I have heard people say that the silica is not reactive and shouldn’t react with the lime however, in my personal experience I have had silica based aggregates and lime mixed and left in buckets with water on top and have come back to them and they are solid and unusable.
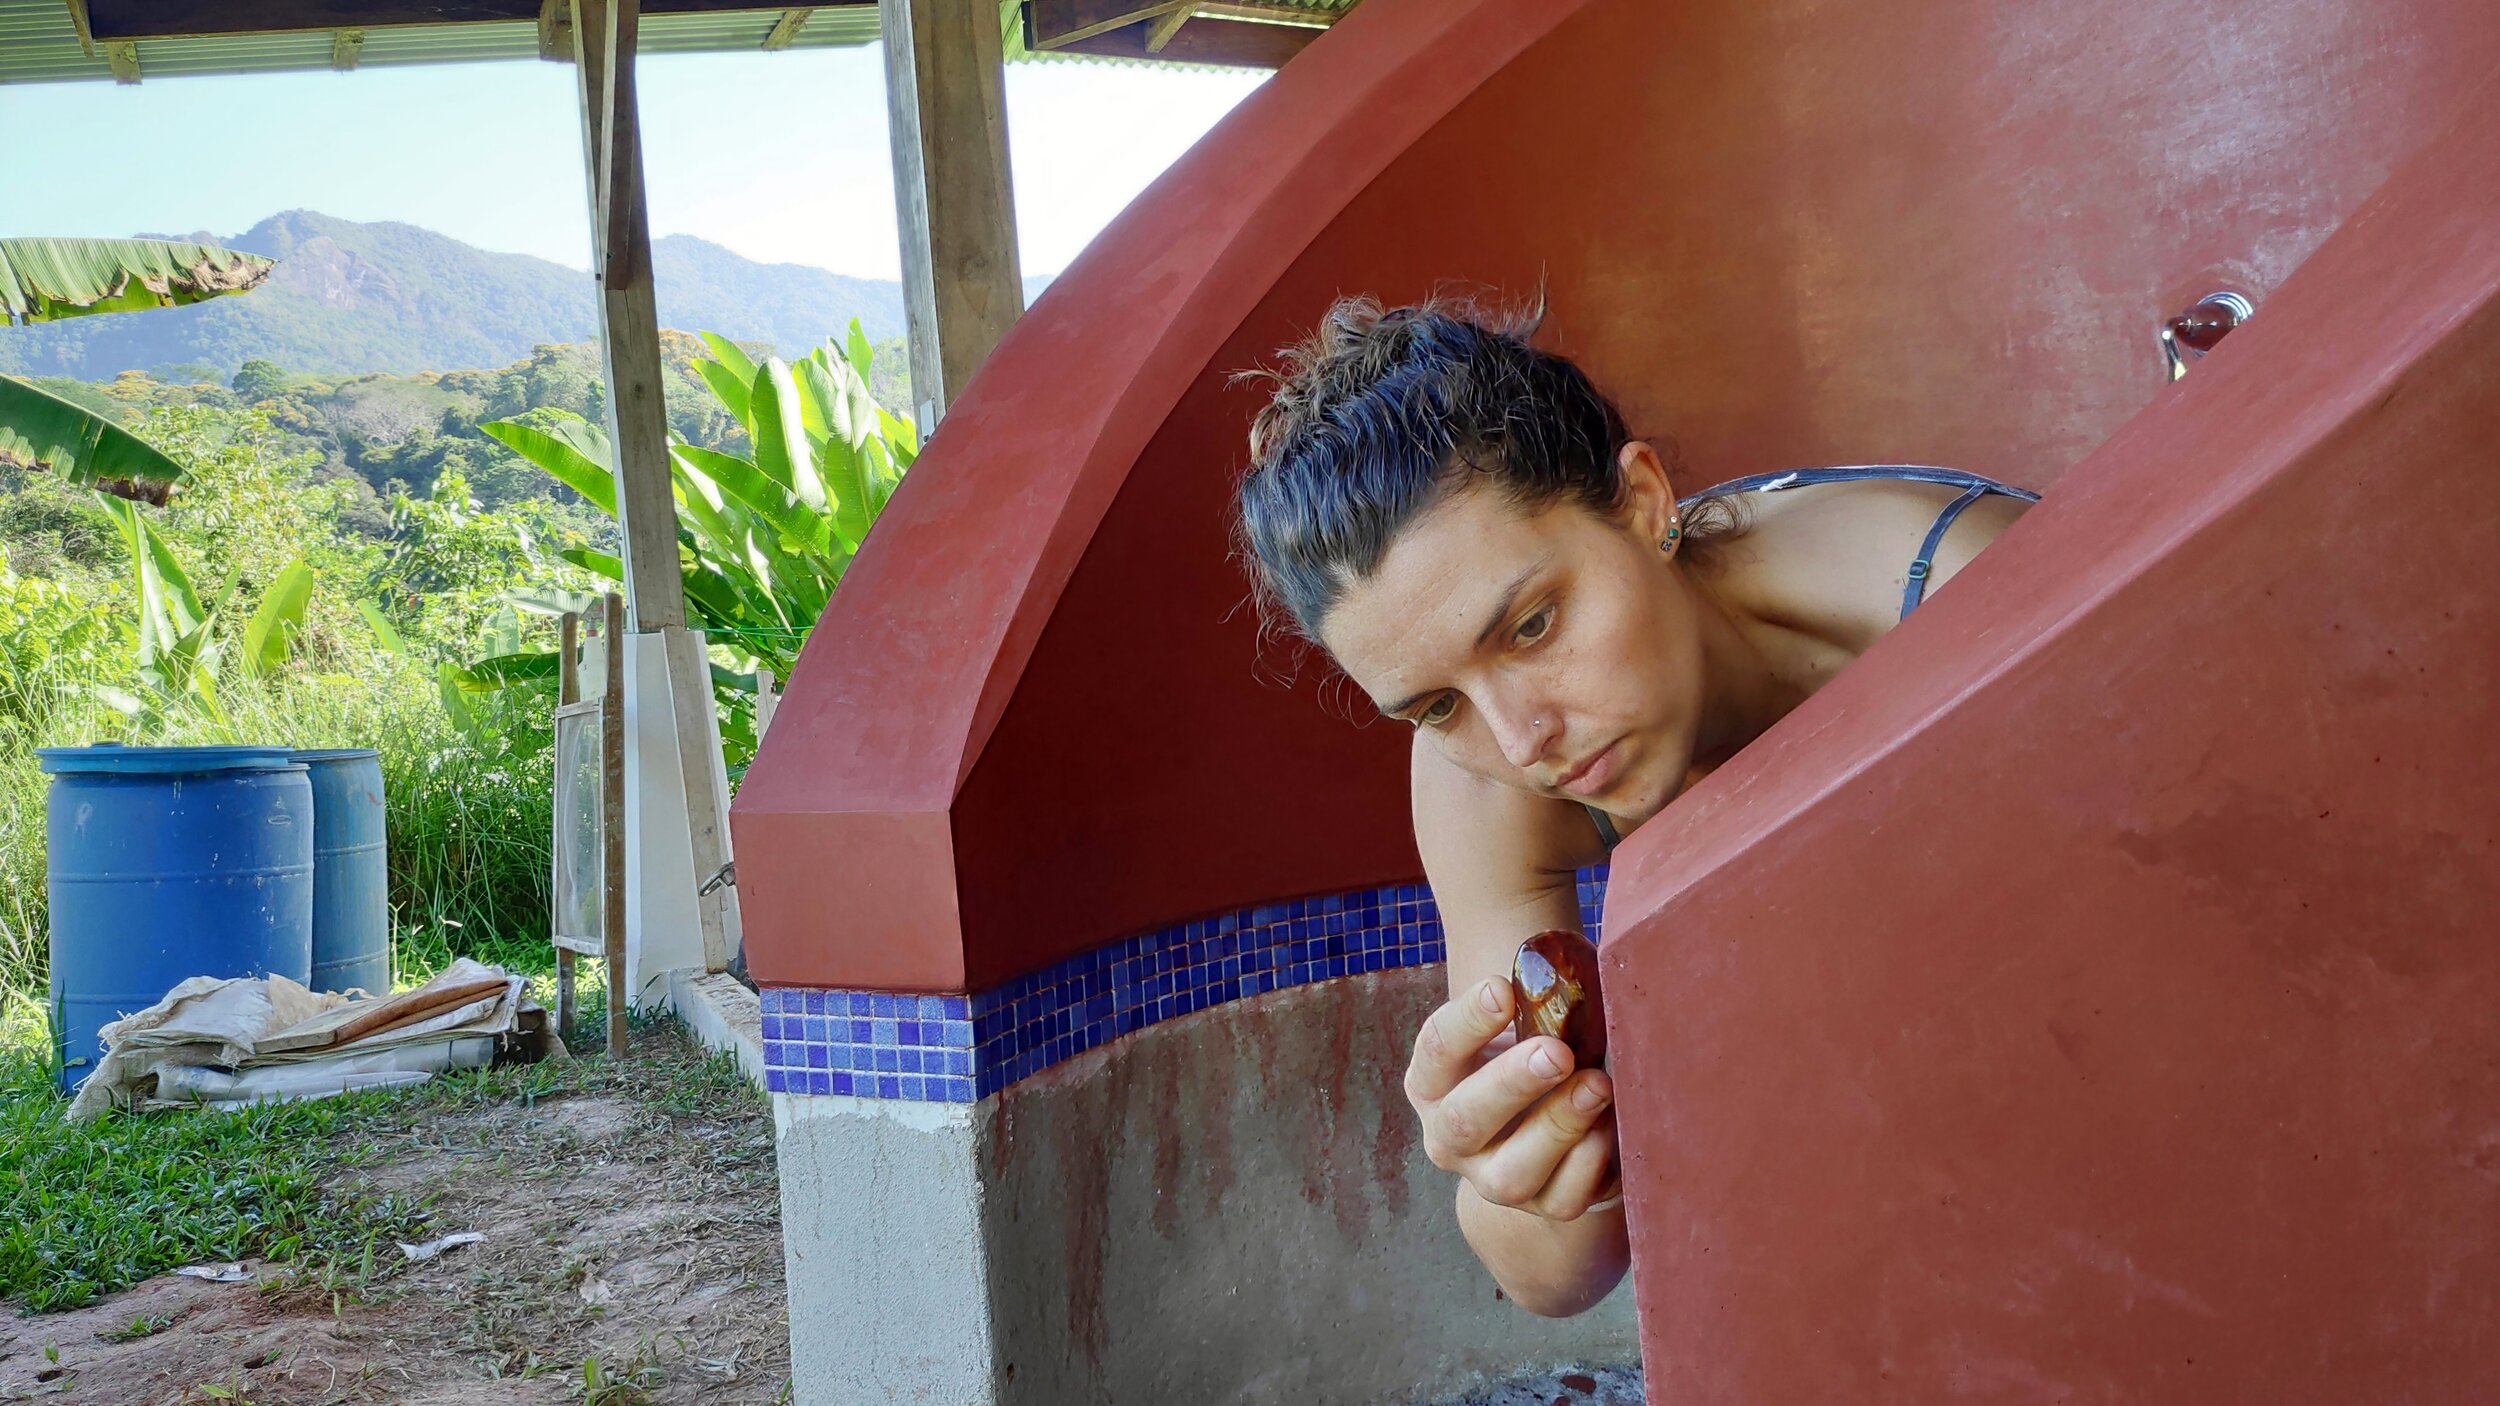
Stoning the tadelakt surface using a precious stone
Polishing tool
What makes Tadelakt unique is the tool that is used to polish the drying lime plaster. A precious stone that is higher than 7 on the Mohs hardness scale is typically used. It has to be hard enough to successfully burnish the surface hence the requirement of certain hardness of stone.
Soaping
Traditionally this soap would have been an olive oil based soap, and some may say that it is not Tadelakt unless you use olive oil soap, but we have been using our homemade soap using our local oils, (lard for example) and our Tadelakt works great! Once you understand the chemistry of the reaction you realize what else can be used. Stearic Acid in soap reacts with the calcium hydroxide in the Tadelakt to create Calcium Stearate. Calcium stearate is very hydrophobic (repels water) making it an excellent (essential!) additive to your Tadelakt. Stearic acid is found in the majority of oils which can then be used to make soap. It is not at particularly high levels in olive oil soap and is actually at much higher concentrations in hard oils like cocoa butter, shea butter and animal fats.

Our home made soap, typically using local oils like lard and coconut oil

Application of soap with a brush
How to apply Tadelakt
One of our close friends Benito of the The Nito Project on YouTube made a fantastic instructional video of how to apply tadelakt. Check it out here.
We typically use a 50/50 mix of lime aggregate and lime putty. We get our lime aggregate from agricultural supply stores and it does vary in its grading. Sometimes it is super fine and the texture of wheat flour and other times it is grittier and has larger sized aggregates. You want the grittier variety to give some substance to your plaster. If you use too fine of an aggregate you will not be able to build much thickness. We always sift our lime aggregate through window screen to make sure there are no large chunks that will really mess up your finish.

Mixing of the tadelakt mixture with a drill and paddle
I guess at this point it is important to mention that like with all plasters controlling the drying time of your plaster is going to be very important. If it dries too fast you will not have time to polish and burnish the surface and may even burn it. If it dries too slowly you may be hanging around for hours waiting for it to dry enough to finish. We have had both scenarios! The problem is each scenario will be different so judgment and experience will be your greatest ally. Some of the site conditions to consider which can drastically affect the drying time will be;
Humidity levels at the site
How windy it is
The substrate you are plastering on
How wet the mix is
How much you wet the wall down
Size of area to be plastered
Some of these you can’t really control, like the humidity at your site. On the other hand you could try and compensate for this with the amount you wet the walls down. Success will in part be dictated by how well you are able to account for the above factors. We therefore always recommend doing samples both on some absorbent surface like the back of a clay tile and on something that is the same substrate you are planning on applying your Tadelakt to give you an idea of how it will go.
Before you start applying any mixture on your finished wall you should put test patches on it as you wet the wall down to see how quickly it is drying.
Finishing the tadelakt
The majority of the time we are applying Tadelakt onto an earthen wall, although we have got some walls which are lathe and plaster (no earth) with a Tadelakt finish. Typically on an earthen wall we apply a lime base coat around ¼” (6mm) thick. This is applied to a well keyed, flat earthen wall. It is important that it is flat as this keeps the lime an even thickness which means that it absorbs water from your Tadelakt at an even rate.
We wait around 30 days for our Lime base coat to carbonate and harden up as much as possible before sealing it in with another layer. As you might be able to imagine as lime carbonates it actually seals off the outer surface to the inner parts, not allowing as much carbon dioxide through and consequentially slowing down the carbonation of the full thickness of plaster applied.
After 30 days we apply the finish coat. As it has a very dry lime base coat it needs a lot of wetting down in order to give you enough time to work the Tadelakt, by also applying multiple layers of Tadelakt, the base coat absorbs the water from the Tadelakt mixture and that also helps slows the suction down. Originally we did multiple layers of Tadelakt now we typically do 2 layers of Tadelakt and build about 1/8th (3mm) thickness. It is important that you test the thickness you can apply first, if your aggregate is very fine you may have to do thinner layers.
As the Tadelakt dries you are able to smooth the plaster and move the cream around to create a smooth uniform surface, when it is dry enough you can begin to burnish it with the stone, the easiest way for a novice is to just keep testing the wall with the stone. By using small circular motions you should be able to compress the surface, if you find that your stone is picking up the lime off the surface it is too early.

Finished tadelakt shower
By checking regularly you make sure you don’t miss the window either, and when you get the sweet spot you will begin to see that you are starting to polish and burnish your surface. The next step is going to be to apply your soapy water. This is made by grating some soap into hot water to dissolve it. We aim for a dilution ratio of 1 part soap to 20 parts water. When applying the soapy water you don’t want it to remove your lime so if you notice it is damaging the surface, it is too early, the soap should absorb into the wall without damaging the finish, as you apply your soapy water you should also be able to continue working the plaster with your stone. You will be able to get it even shinier now that you have added the soap!
Good luck with you next Tadelakt project!! If you would like to join us for a natural building workshop check out our workshop page to see when the next one is scheduled for. We also offer a day workshops on a whole host of subjects incuding Tadelakt.
Past Blogs About Natural Building
Building an Adobe Shower with Tadelakt Plaster
Design Ideas for a Sustainable Home in the Tropics
Want to Learn More?
Join us for one of our annual building workshops to get hands on experience in different natural building techniques.